Learn how to get started on Zwift with our beginner’s guide! Discover essential gear, tips for first rides, and how to join virtual group rides.
So, you’ve decided to jump into Zwift. Good call! If you’re like me, and maybe felt a bit hesitant at first about the idea of “virtual cycling,” trust me, you’re not alone. I thought, “How can indoor biking feel anything like a real ride?” But Zwift truly surprised me; it’s not only fun, but it’s a seriously effective way to stay fit, especially when outdoor rides aren’t an option. This beginner’s guide will walk you through everything you need to get started and a few tips I learned (sometimes the hard way) along the way.

Step 1: Set Up Your Gear
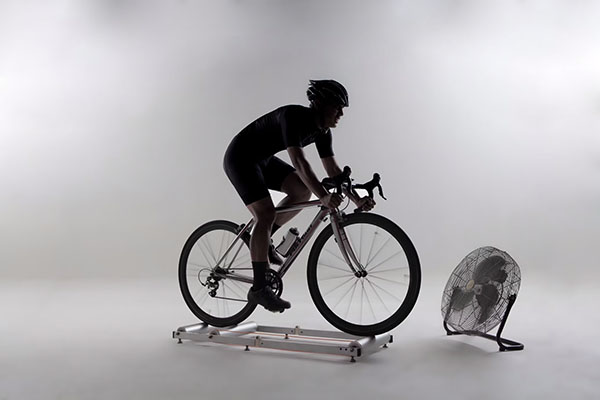
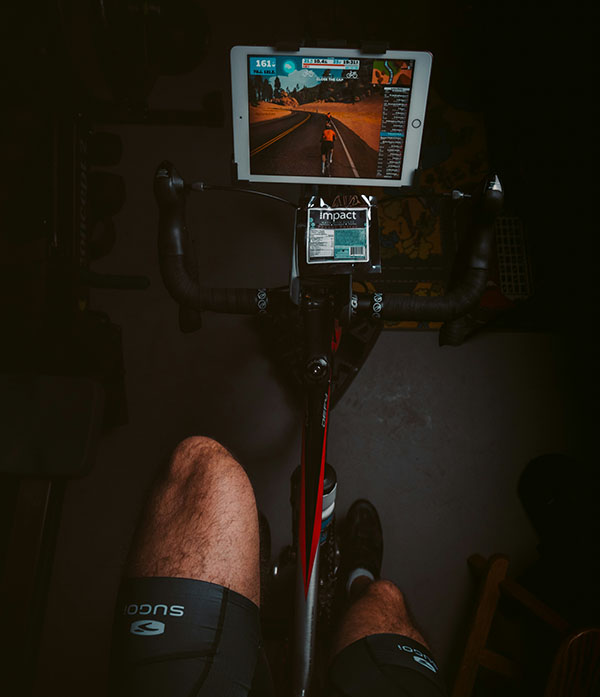
First things first: the gear. At a minimum, you’ll need a bike, a stationary trainer, and a device (like a laptop, tablet, or smart TV) to run the Zwift app. If you’re using a basic “dumb” trainer without built-in resistance or connectivity, you’ll also need a speed sensor or cadence sensor to help Zwift simulate your ride. But if you’re willing to invest, a smart trainer is worth it, seriously. Smart trainers automatically adjust resistance based on the terrain in Zwift, which makes climbs feel real. And let me tell you, tackling a virtual hill that actually feels tough makes the whole experience way more engaging.
Pro tip: If you’re planning to ride a lot, look into a fan (or two) for cooling. You’ll sweat a lot indoors, and without a breeze, it gets hot fast. I learned this the hard way after a drenched first ride in my living room!
Step 2: Setting Up Your Zwift Account
When you first open Zwift, you’ll create an account and customize your avatar. Take the time to set up your weight and height correctly because Zwift uses these stats to simulate your power output and speed on different terrain. It might be tempting to “tweak” the numbers a bit (thinking it’ll make you faster), but it actually makes your experience less accurate. The best way to improve is by setting a realistic baseline and seeing how you progress over time. You’ll thank yourself later when you’re smashing up a virtual climb and seeing real results.
Zwift offers a 14-day free trial, so you can test it out before committing to a subscription. Personally, the trial convinced me to go for it. Within those first few days, I was hooked.
Step 3: Choosing Your First Route and Ride Style
Here’s where things get exciting. Zwift has tons of routes, from flat tracks to rolling hills to intense climbs that’ll challenge even the most experienced riders. I’d recommend starting with a beginner-friendly route, like Watopia’s “Flat Route” or “Tick Tock.” Both have minor elevation but nothing too intense, perfect if you’re still getting used to riding indoors. If you’re like me, you’ll probably feel tempted to tackle some of the tougher routes right away. But trust me, it’s better to build up gradually, especially if your legs aren’t used to sustained resistance.
When you’re ready, join a group ride or event. Zwift hosts tons of them daily for different levels, and they’re a great way to meet people, get motivated, and stick with a pace. Even if you’re not super competitive, it feels good to ride with others, especially if you miss the social aspect of outdoor cycling.
Step 4: Understand Zwift’s Workout Plans (and the Zwift FTP Test)
One of Zwift’s best features for beginners is its structured workout plans. These are game-changers. If you’re unsure how to plan your rides, just choose a program, and Zwift will guide you through each session. Programs like “Build Me Up” or “FTP Builder” are popular for beginners who want to build a solid cycling foundation.
Speaking of FTP (Functional Threshold Power), you’ll want to take an FTP test early on. Don’t stress, it’s just a way for Zwift to calculate your fitness level, so it can customize your workouts accordingly. Your FTP score is basically the maximum power you can sustain for an hour. It’s tough, but taking this test gives you a starting point, and you’ll see it improve over time. Just remember to warm up well; the test can be intense, and I was pretty wiped out after my first go.
Step 5: Get Comfortable with Zwift’s Interface and Community Features
Zwift’s interface can be a bit overwhelming at first, but once you know your way around, it becomes second nature. On the main screen, you’ll see your speed, cadence, and power output (watts). You’ll also notice other riders around you, Zwift is social! You can send “Ride Ons” to encourage other cyclists, chat during group rides, and even join clubs or challenges.
A quick note on Zwift’s community: it’s awesome. You’ll meet cyclists from all over the world, and everyone’s surprisingly friendly. If you’re ever struggling with a climb or just need a boost, you’ll often get a “Ride On!” from another rider, and it’s honestly motivating.

Final Tips for Zwift Beginners
- Start Slow: Zwift can be addictive. It’s easy to overdo it because the environment is so engaging. Start with 2-3 rides per week and gradually increase.
- Watch Your Posture: Without the natural movement of outdoor riding, indoor riding can cause tension, especially in your back and shoulders. Relax your grip and shoulders, and if possible, invest in a bike fit specific to indoor riding.
- Stay Hydrated: You’ll sweat more than you think indoors, and without the wind, it’s easy to get dehydrated. Keep a big water bottle handy and refill it as needed.
- Explore Events: Zwift’s events range from casual group rides to races. Don’t hesitate to join; they add a whole new level of motivation. And trust me, even if you’re not a racer, the competition can be fun once you get comfortable.
- Have Fun: Zwift is meant to be enjoyable. Try different routes, join new challenges, and explore the virtual world at your pace.
Getting started with Zwift takes a bit of setup, but it’s worth it. Now that I’m a few months in, I can’t imagine going back to just riding outdoors (though I still love a good road ride). With Zwift, you can ride year-round, track your progress, and connect with a global community.


